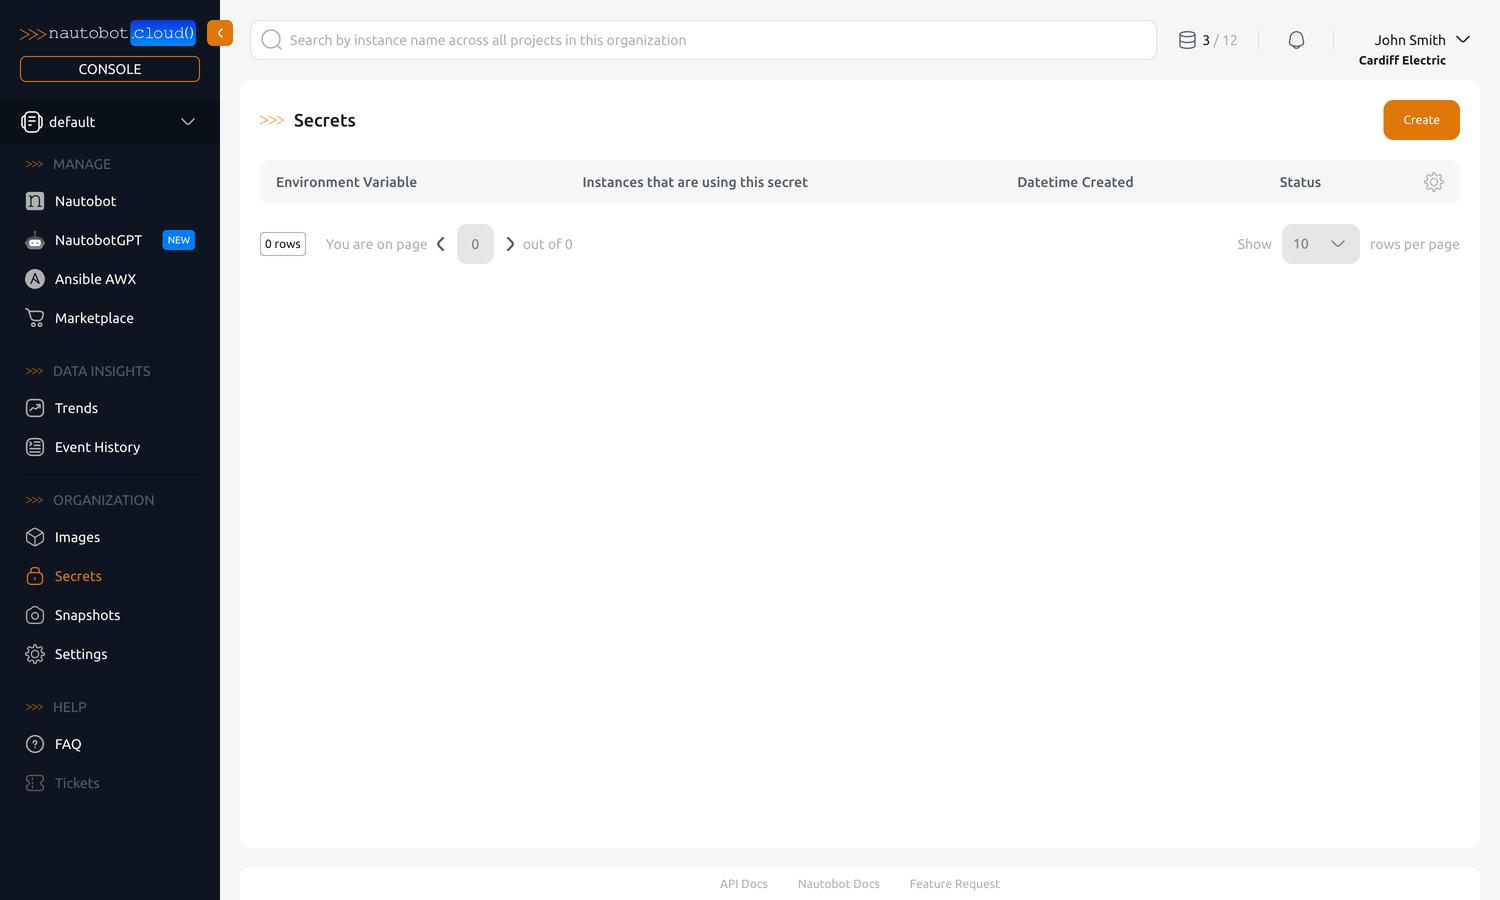
Manage Secrets
Secrets allow you to pass sensitive information and configuration to your instances as environment variables. Secrets are managed in the Organization Secrets tab in the left-hand navigation pane.
Sensitive vs Non-Sensitive Information
Secrets are intended for sensitive information that should not be visible in the UI after creation. To manage non-sensitive configuration more directly, consider configuring the instance's environment variables from the instance detail view instead. See Manage Instances for more information.
Create a new Secret
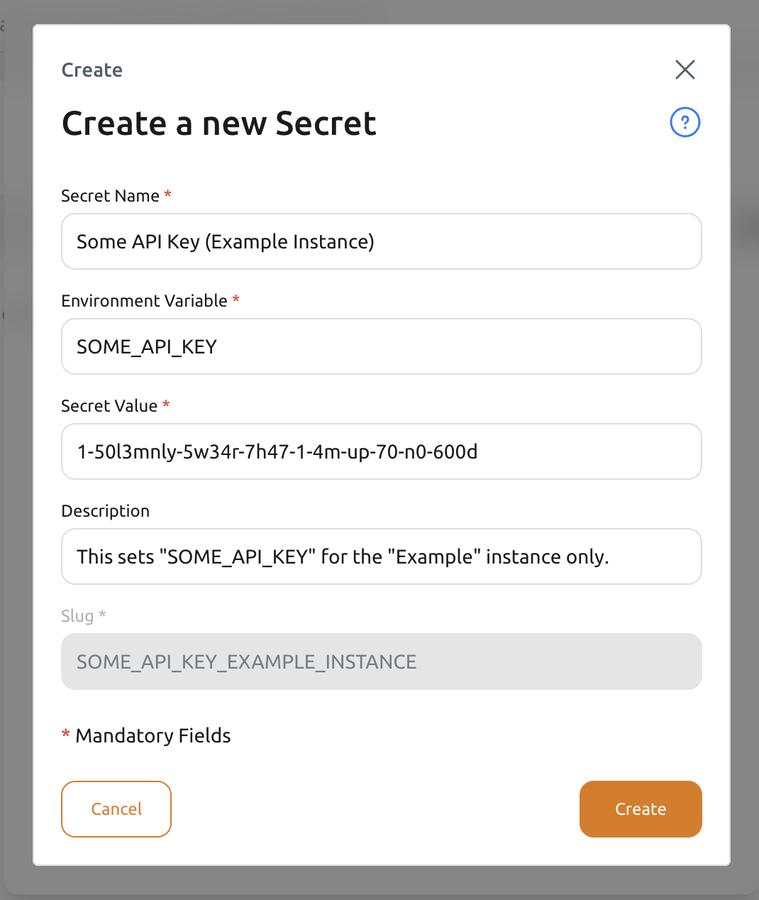
You can create a new secret by clicking the Create button in the top-right corner of the Secrets page. A dialog will appear with a form to fill out the details of your new secret.
Fields
| Field | Required | Description |
|---|---|---|
| Secret Name | Yes | The human-readable name for the Secret. |
| Environment Variable | Yes | The environment variable name that the secret will be available as inside the Instance it is associated with. You can use the same environment variable name for multiple secrets, but not for multiple secrets associated with the same Instance. |
| Secret Value | Yes | The value (string) of the secret. This value will be vaulted by Nautobot Cloud Console upon saving and cannot be viewed after saving. You can edit the value later by selecting the Secret and updating the Secret Value field. After associating the secret to an instance and restarting that instance, the value will be non-vaulted and exposed as the specified environment variable. |
| Description | No | A human-readable description of the secret for additional context in the Nautobot Cloud Console UI. Not used for any other purpose. |
| Slug | Auto | The string used to reference the secret within the API. This is auto-generated and cannot be changed once created. |
After filling out the form, click the Create button at the bottom. You will be brought back to the list of secrets, where you will see your newly created secret. In order to use the secret, you must associate it with an instance.
Associate a Secret with an Instance
Associating a secret with an instance makes the secret available as an environment variable inside that instance. This allows you to customize the behavior of the instance or applications running inside it, assigning instance-dependent values to the same environment variable for different instances. There are multiple ways to associate a secret with an instance.
Method 1: From the Secrets List
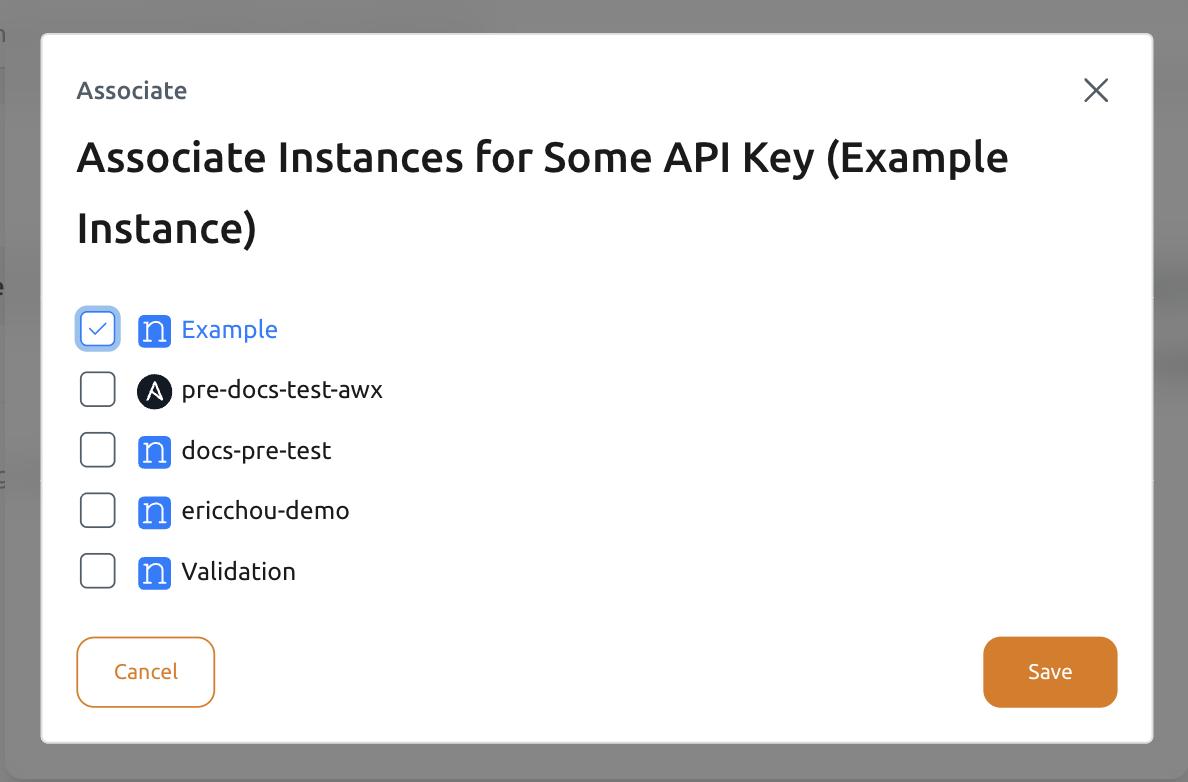
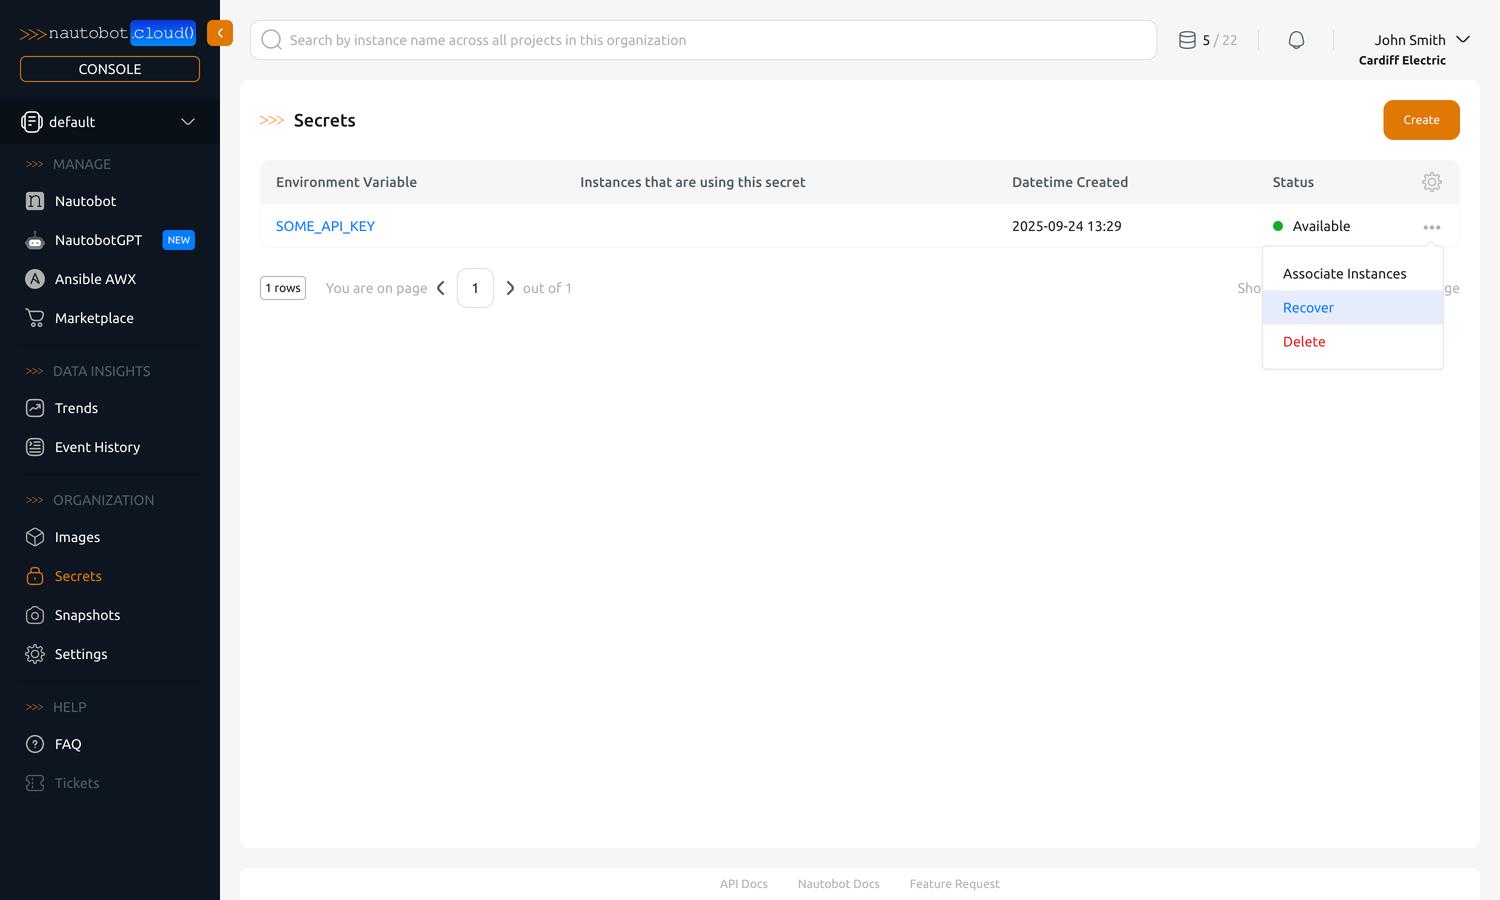
Navigate to the Organization Secrets tab in the left-hand navigation pane. Click on the ... (ellipsis) button on the right of the secret you want to associate with an instance. Select Associate Instances in the dropdown menu.

This will bring up a dialog where you can select one or more instances to associate the secret with.
Method 2: From the Instance Detail View
You can also associate a secret with an instance from the instance detail view. See Manage Instances for details.
Edit or Delete a Secret
To edit the display name or description of a secret, click on name of the secret in the list. This will bring you to the detail view of the secret.
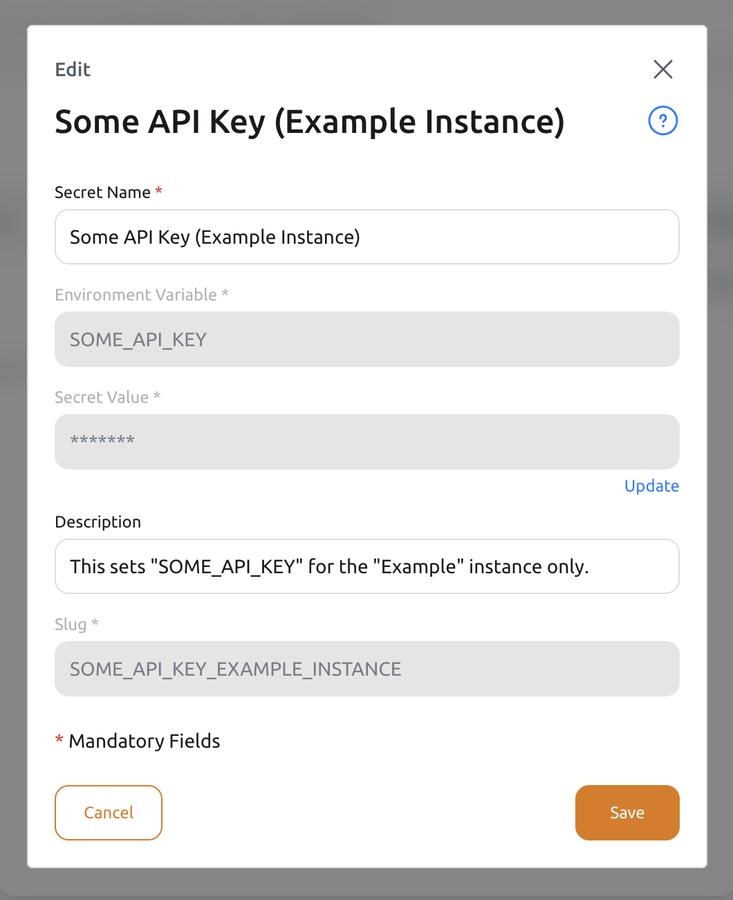
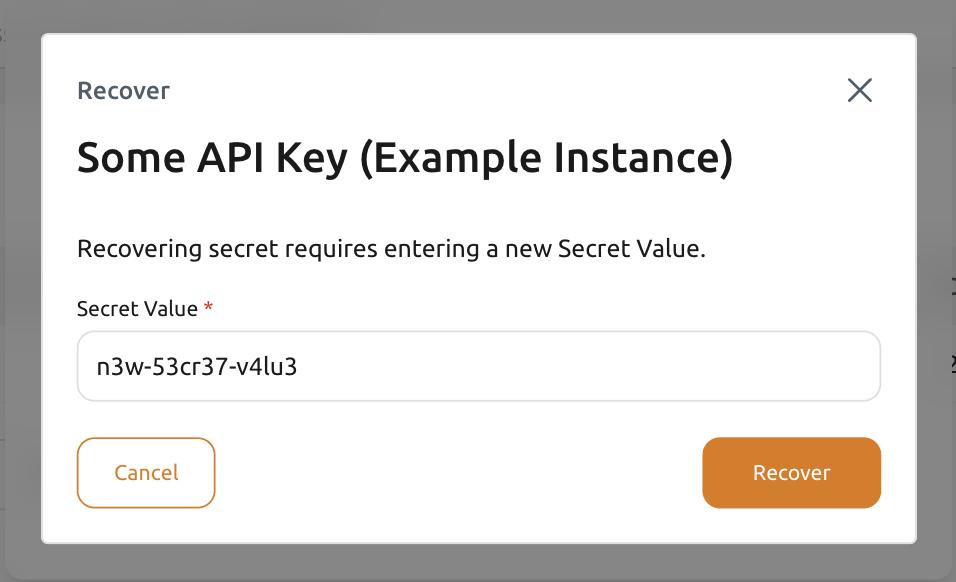
The secret value is vaulted and cannot be viewed after creation. To edit the value, navigate to the secrets list and click the ... (ellipsis) button on the right of the secret you want to edit. Select Recover in the dropdown menu.
This will bring up a dialog where you can enter a new value for the secret.
To delete a secret, navigate to the secrets list and click the ... (ellipsis) button on the right of the secret you want to delete. Select Delete in the dropdown menu.

Using a Self‑Hosted Vault for Secrets
Added in version 3.0.9 — Customer Vault Support
Support for connecting to a self-hosted Customer Vault was added in base image: 3.0.9-20260326.0
To connect Secrets to your self-hosted HashiCorp Vault instance, you will first create Secrets for your instance using the Create a new Secret steps above. These Secrets will tell Nautobot how to connect to your Vault instance. The environment variable names will correspond with the On-Prem Nautobot Secrets settings, which can be found here.
Note
Only approle and token authentication methods are supported in Nautobot Cloud.
First, enable the Customer Vault integration via the Secret:
NAUTOBOT_CLOUD_ENABLE_CUSTOMER_VAULT_INTEGRATION = True
Next, configure the rest of the Secrets for your Vault:
Note
For more details on each of these settings, see the Nautobot HashiCorp Vault Instructions.
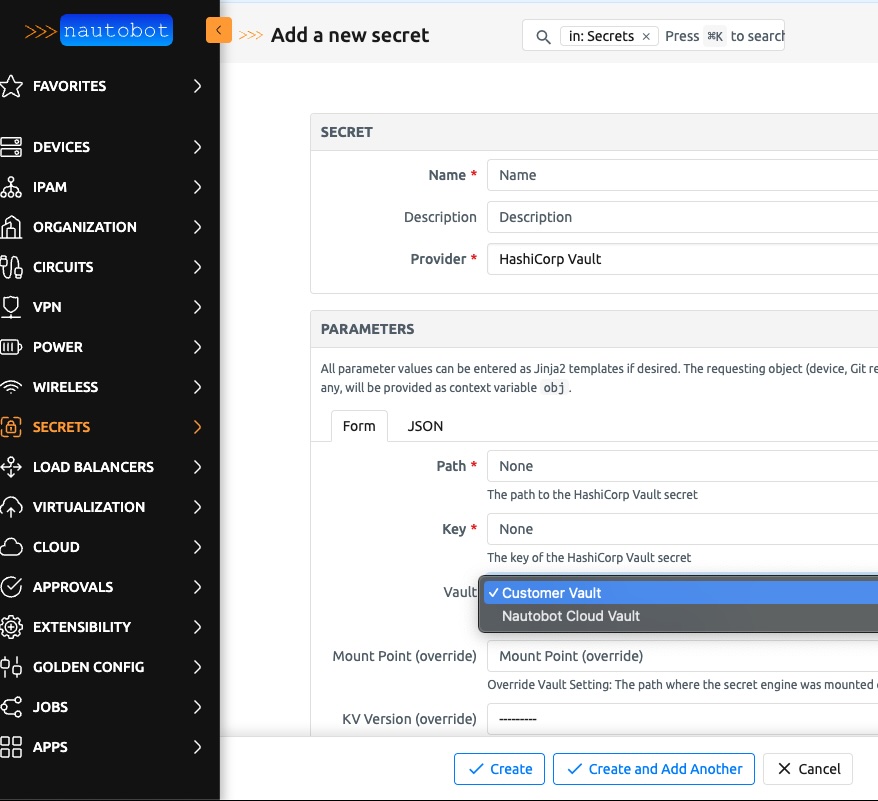
After you update the instance and ensure the Environment Variables are available, you can add your self-hosted Secrets directly into the Nautobot UI. When adding a Secret, you'll see two Vault options (screeshot below). Choose the Customer Vault option, input the correct information for the Secret located on your self-hosted Vault instance, and Nautobot will be able to retrieve it.